There’s a perfect balance to great silhouette images. Whilst they hide every detail about an animal besides its shape, they reveal just enough to let the viewer’s imagination run wild and tell a compelling story. I’m a little obsessed with silhouettes, and I try to capture them whenever I get a chance.
Being able to shoot silhouettes is a great trick to know for when you’re out in the field and you stumble upon the perfect conditions. If done properly, silhouette images can add a whole new dimension to your wildlife photography and show off your subject in a different light. Literally.
By the time you’ve finished reading this, you’ll know everything you need to get started shooting wildlife silhouettes right away. So let’s go!
TL;DR Version
The background of your image needs to be significantly brighter than your subject. The simplest way to achieve this is to position yourself so the sun is directly behind your subject.
You need to expose your image for the background. The simplest way to achieve this is by using spot metering or exposure compensation.
It’s crucial that you capture your subject in a great pose with a clean outline.
If you’ve got a bit more time, let’s dive into those points in more detail…
It’s all about contrast
Contrast is the most important, tastiest ingredient of a silhouette shot. You want to find a composition where the background of your image is significantly brighter than the animal you’re trying to photograph. Once you’ve found that you can expose your image for the bright background, causing the animal to be plunged into darkness.
The easiest way to find this contrast is to line yourself up so the sun is directly behind the animal, like this excellent demonstration I’ve prepared for you:
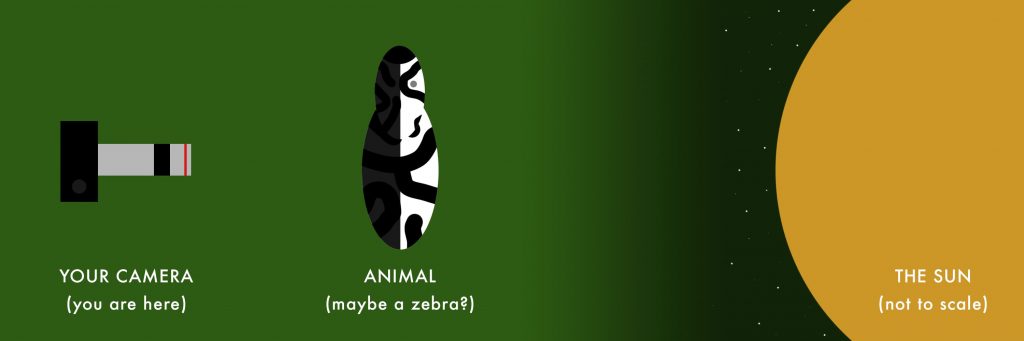
The best time to go looking for this is at sunrise or sunset on a clear day, when the sun is low in the sky (but read on for exceptions to that rule). It also helps if you’re trying to photograph an animal which is not on the ground – birds perched in trees are perfect for this!
Expose yourself properly
The key thing to remember is that you want to expose for the background of the image, not the subject. Many automatic modes on digital cameras will try to properly expose the animal which will cause the background to be overexposed, so here are a few ways to getting the correct exposure:
Method #1: Spot Metering & Exposure Lock
This is the method I use most when I’m specifically out to shoot silhouettes. I find it to be the most accurate and predictable way of exposing a silhouette shot.
What is spot metering? By default most cameras use evaluative/matrix metering, where the camera looks at the entire frame to decide what the best level of exposure is. That might work well for situations where the light is even across the image, but it can cause images to be too over- or under-exposed in other situations. Spot metering, on the other hand, looks at the brightness of a single point to decide how to expose the image.
Once you’re in spot metering mode, make sure your camera is set up to lock exposure when the shutter button is half-pressed. When you now point that metering spot at the background of your image (which should be the brightest part) and half-press the shutter, your exposure will be locked in for your silhouette shot. Re-compose your image how you want it (whilst still holding down the shutter half way) and then fully press the shutter to take the picture. Voila!
Note: this works much better if you’re also using back-button focus.
Method #2: Exposure Compensation
This is the method I use most when I’m out shooting general photography. I find it to be less accurate than spot metering as it might take me a few attempts to dial in correctly, but with the way I have my camera set up for walking around it’s the quickest to get to in a hurry.
Staying in whichever metering mode – evaluative/matrix, spot, centre-weighted etc – you would normally use, bring your exposure compensation down to darken the image. I tend to start with -1 and experiment from there. If the animal is quite small in the frame then you’ll most likely need less compensation than if your subject is filling to frame.
This is also the easiest way to take silhouette shots on a smartphone. The way I do it on my iPhone is by opening my camera app, holding my finger down on the screen and dragging downwards to under-expose the shot. Try it!
Method #3: Manual Exposure
I’m not a manual exposure kind of guy so this is not the method I use for silhouette shots, but it’s also a valid option to consider. By using manual mode you have complete control over the exposure of your image, so just keep your exposure down to the point where you lose the detail of the animal but the background is still bright.
Outlines are crucial
As I mentioned at the start, by taking a silhouette shot of an animal you are removing every detail about it except its shape. Bright colours, pretty patterns, funny facial expressions – they’re all gone. Your subject is reduced from three dimensions to two. The animal’s outline is now the only thing you can show the viewer, so you need to make it the best it can possibly be.
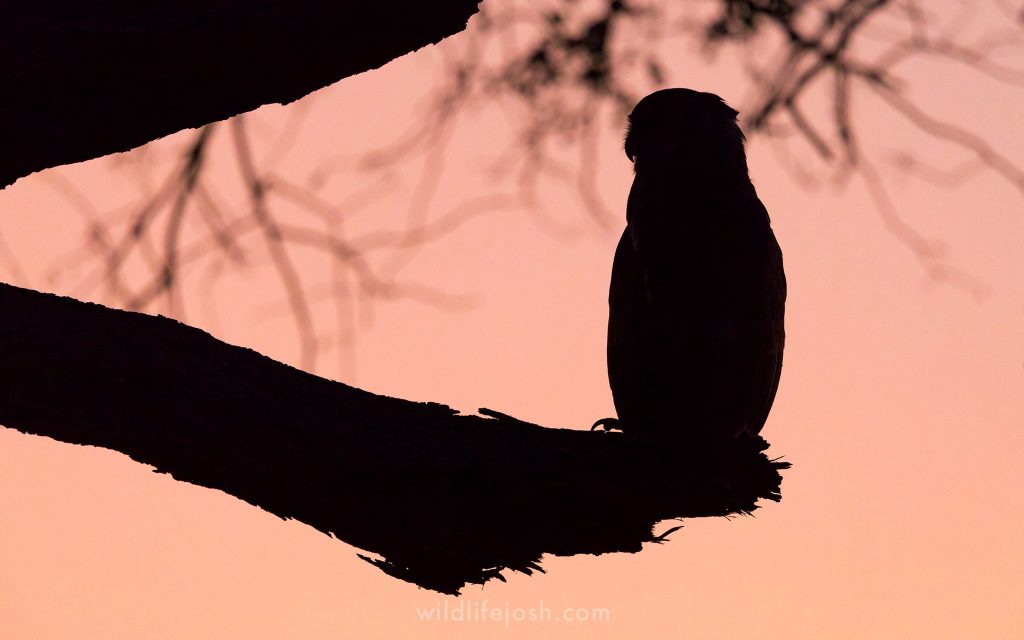
Below is a bird I was very excited to see, but sadly the picture I got just doesn’t work. The sky is a beautiful pink, but the owl just looks like a blob on a stick. Did you even know it was an owl at first glance? You can just about make the beak and a few talons but it’s far from obvious, which is why you’ll only ever see this image in tutorials like this:
Your subject’s head and body position will also have even more of an effect on the image than normal, so keep a close eye on those. It may mean waiting for that split second when the animal shifts position slightly or moves its head to look the other way.
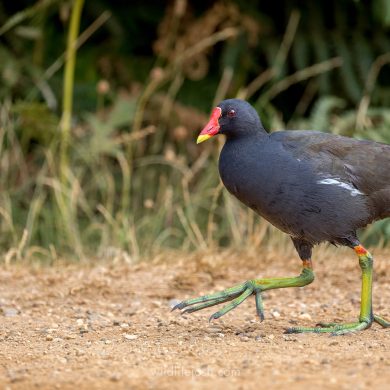
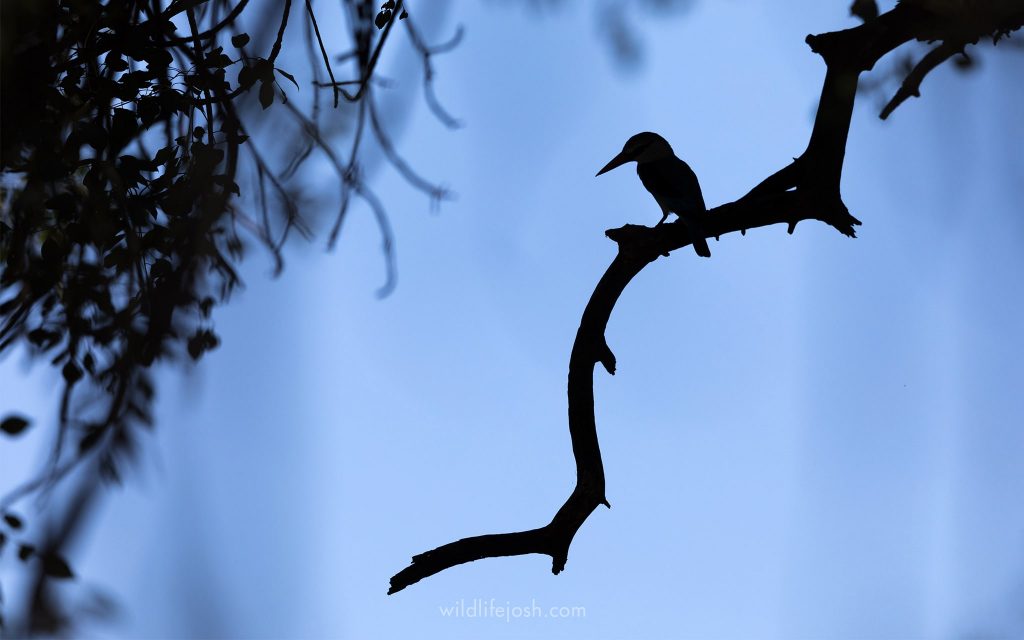
Another thing to look out for is if there’s anything that cuts across its outline, such as branches or rocks. If the viewer needs to take a moment to figure out what it is they’re looking at, the image won’t have the same impact as one with a very clean outline. Below are two photos taken moments apart – the first when I had just seen the kingfisher, and the second after taking two steps to my right. Notice the difference? The branch in the background might be subtle, but it has a huge impact on the image:
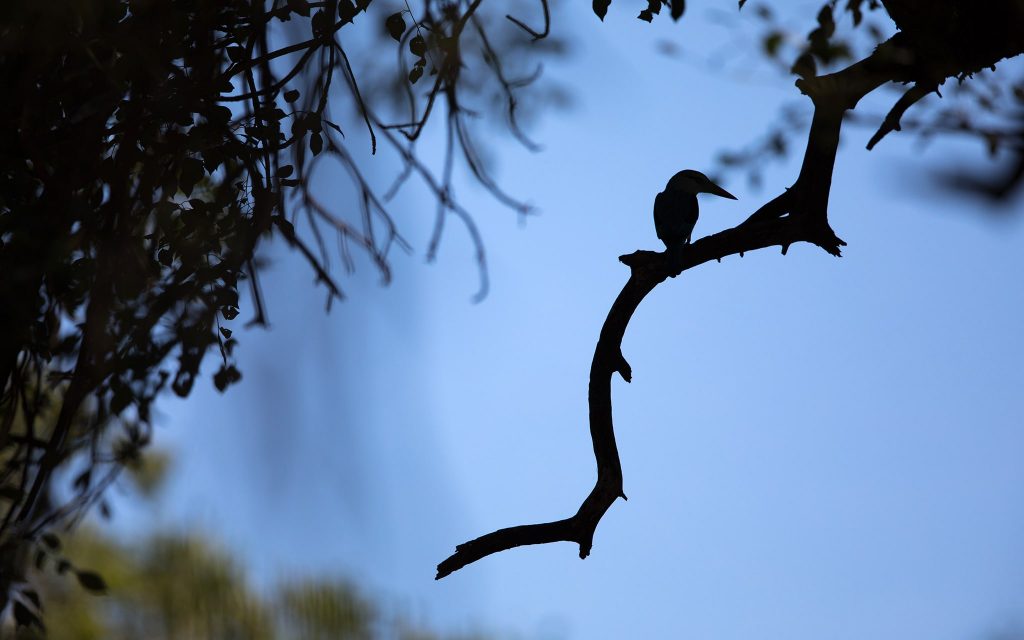
Messy Outline 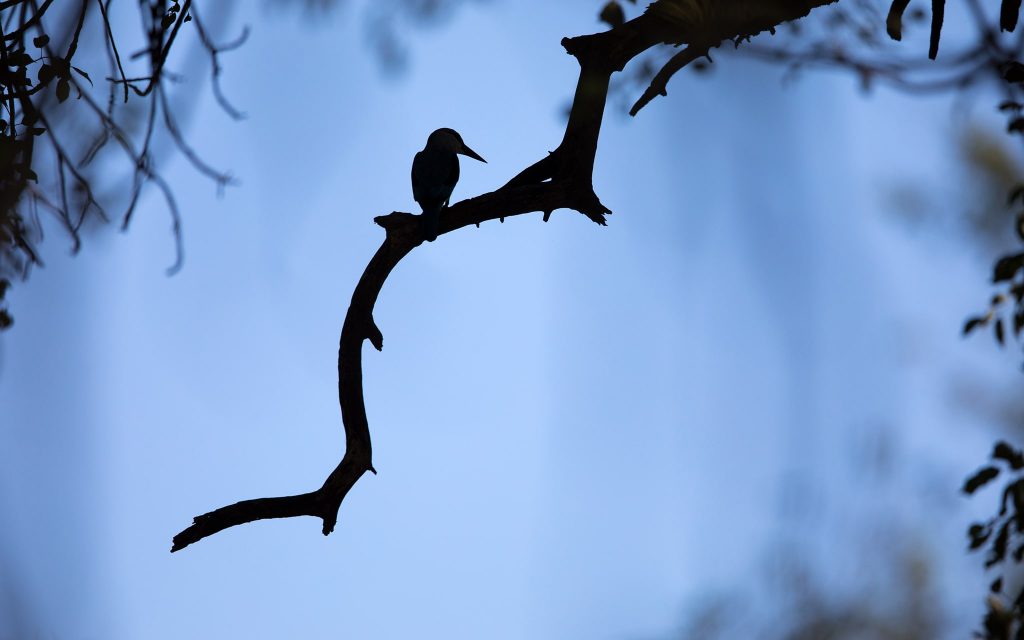
Clean Outline
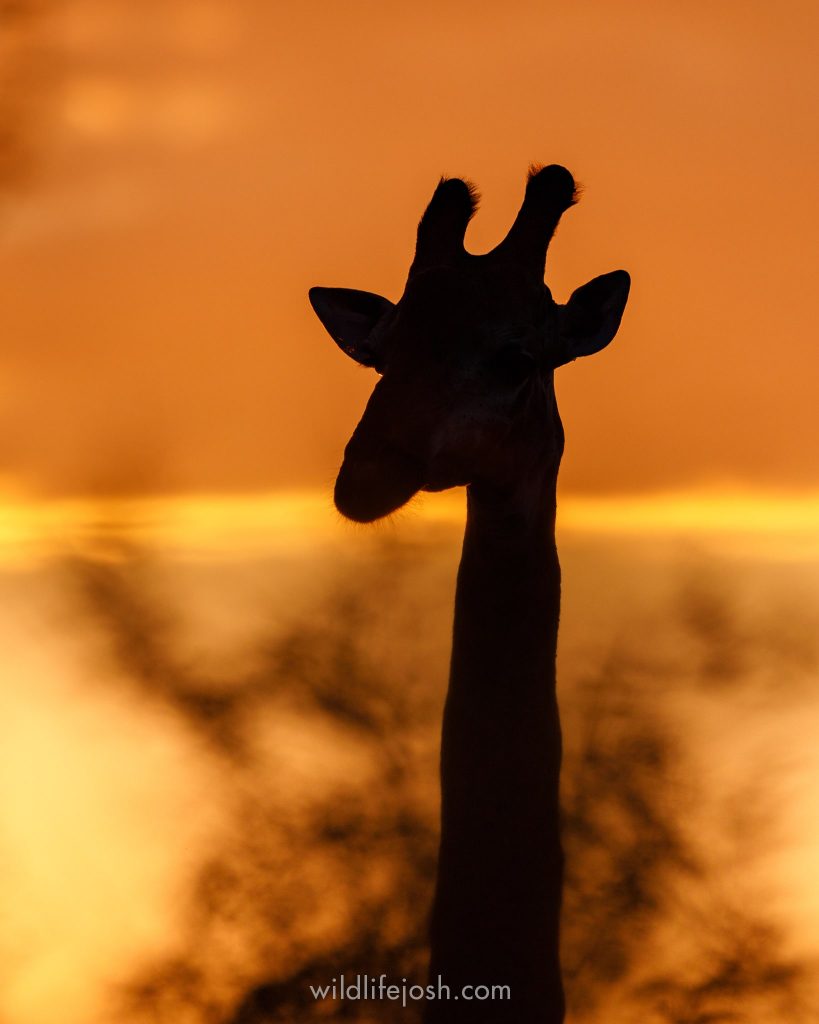
If you really can’t get a clean outline but the obstruction is closer to you than the animal is, try to get as close to it as possible (as long as it is safe to do so). This should at least throw the obstruction out of focus, and therefore make it less distracting. I did exactly that in the image below, when I couldn’t avoid the thick bush between me and this giraffe:
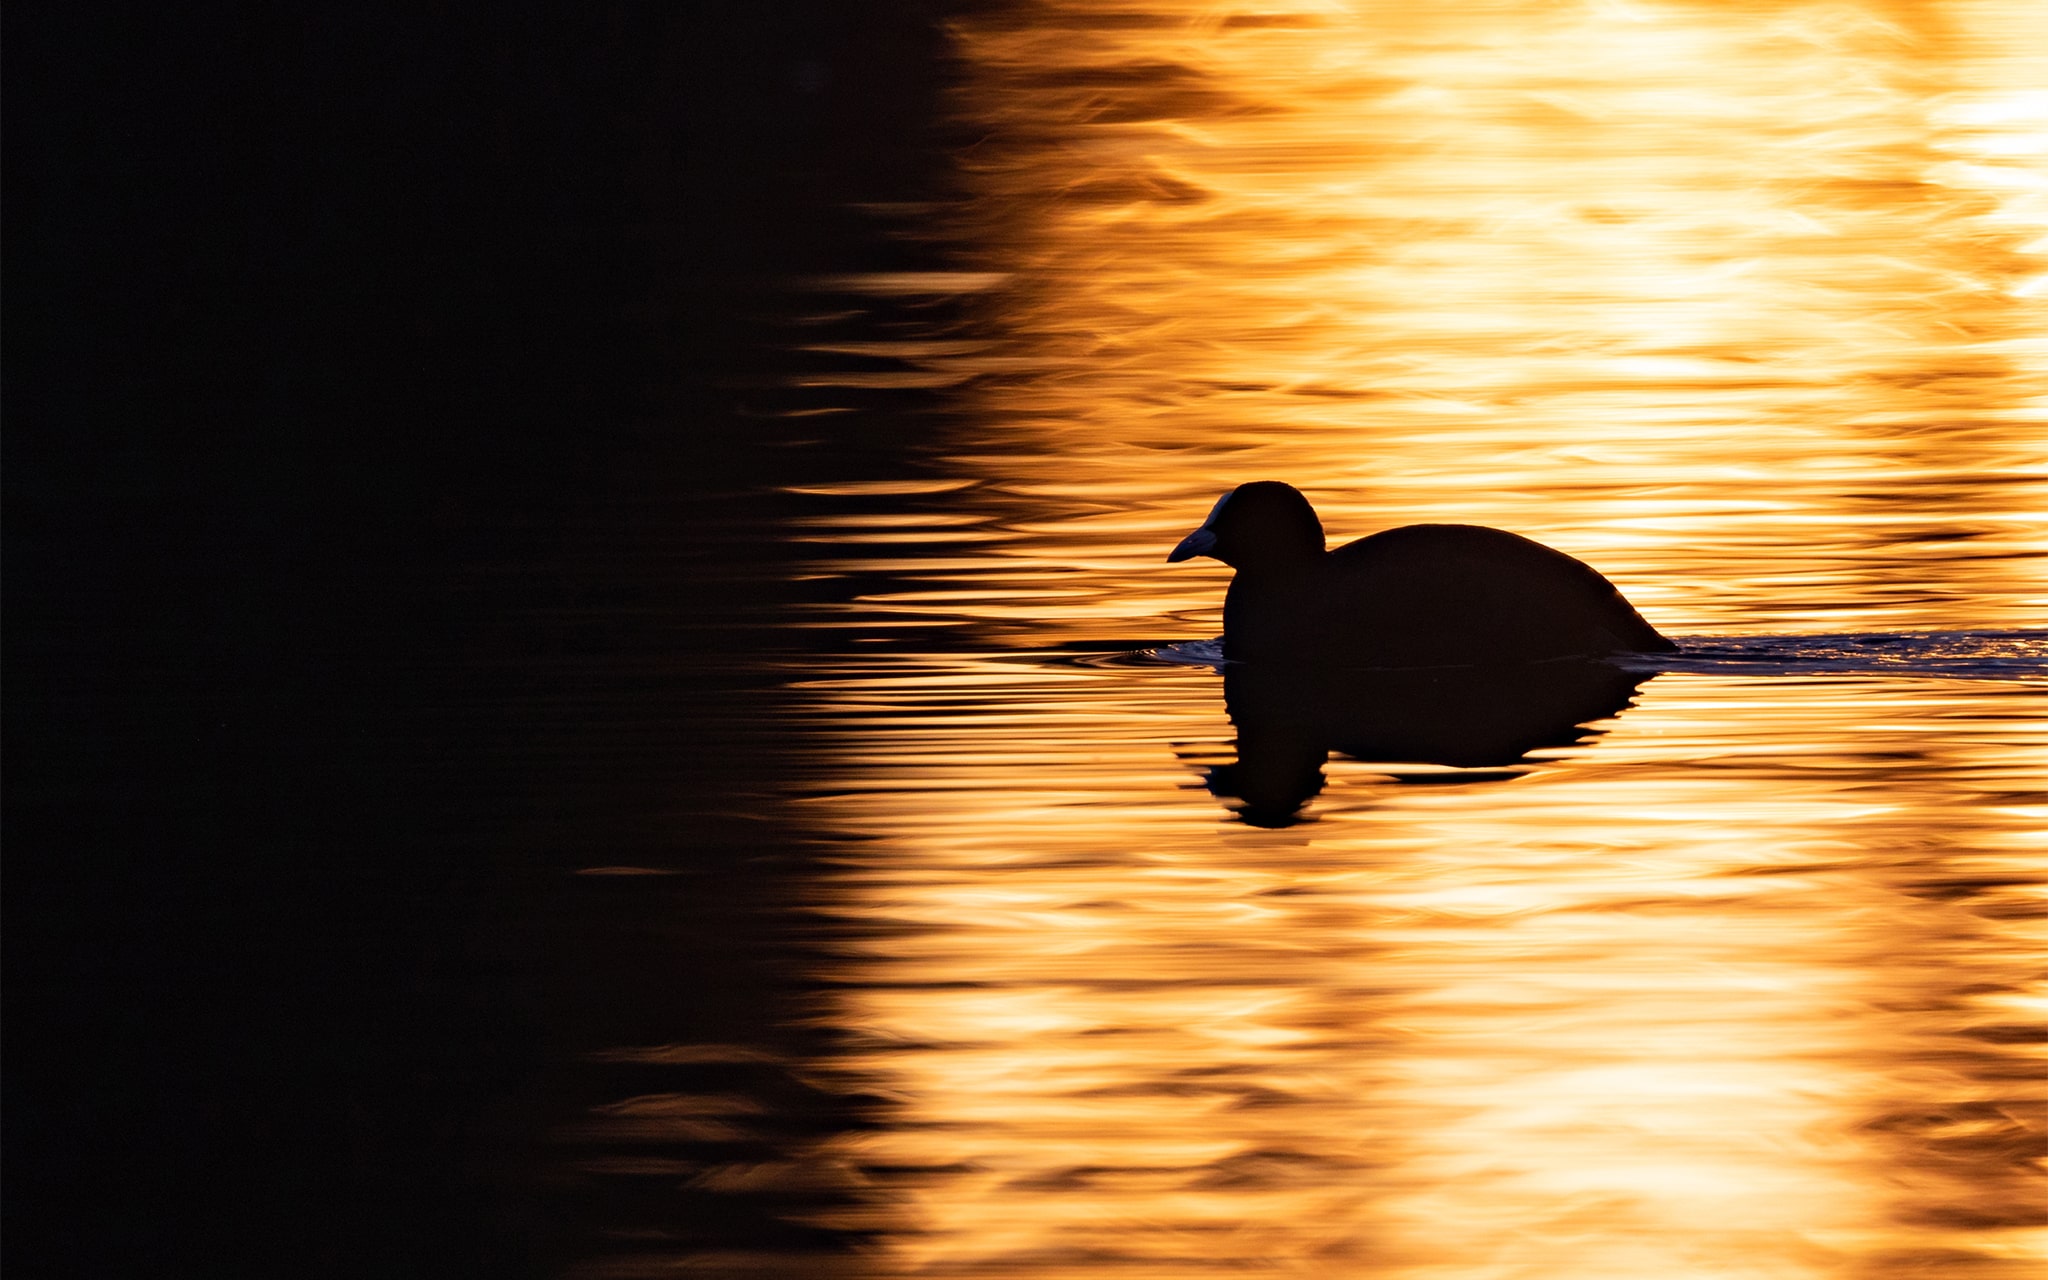
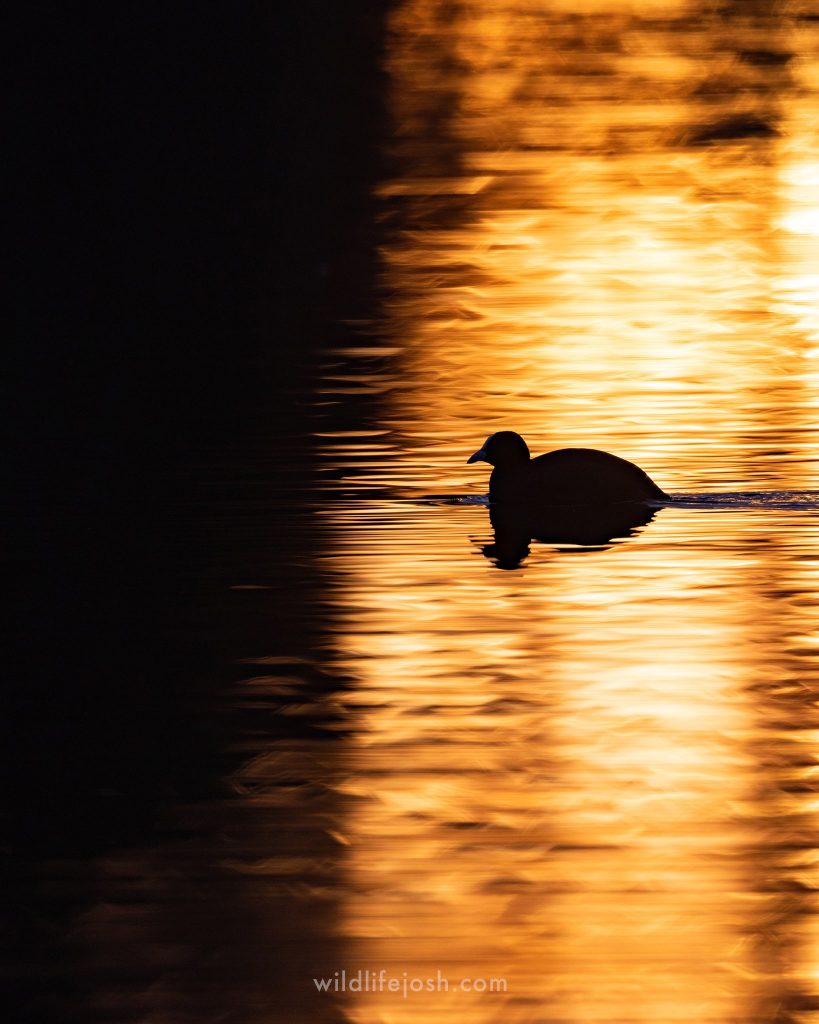
Time to reflect
So far I’ve only mentioned putting the animal directly between you and the sun to create the contrast you need for a silhouette. If you want to get more creative though, try to use the reflection of sunlight on water to give you the desired backlight. This is especially useful here in the UK where we don’t get anything like those beautiful African sunrises and sunsets – in fact, the shot below was taken here recently in the middle of winter:
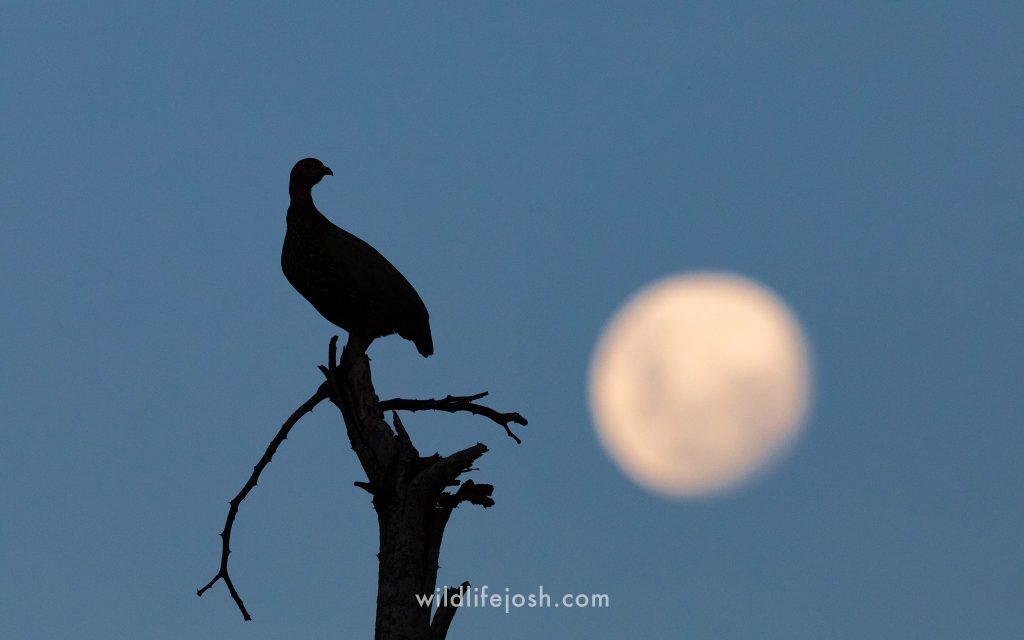
If you want to get really carried away, you can take this concept to the extreme. In the image below I used the light of the sun, bouncing off the surface of the moon, to light the back of this Swainson’s Spurfowl after sunset. I call this image Fowl at the Moon, and I’m prouder of that title than I probably should be:
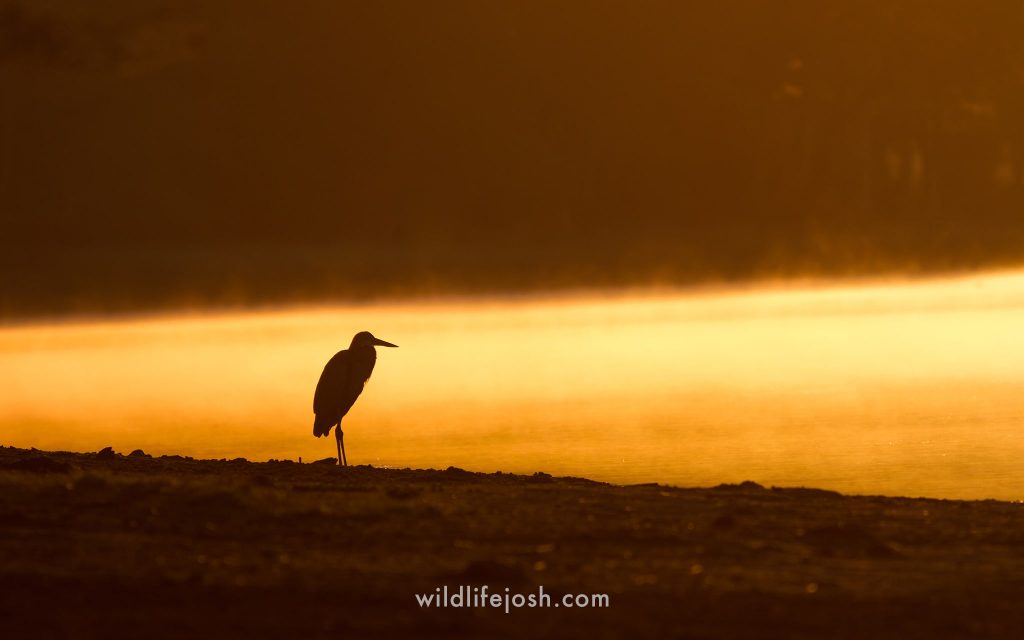
And here’s one more watery silhouette of a Goliath Heron at dawn for you:
Don’t give up during the day
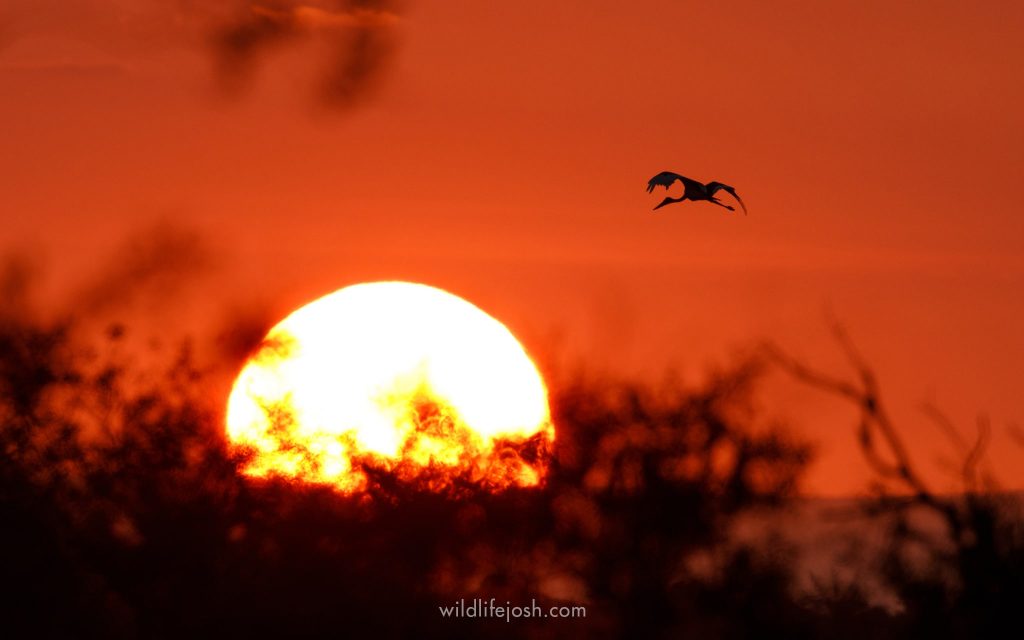
You may have noticed that almost all of the images I’ve shown you so far were shot at sunrise or sunset, and I suppose there are two main reasons for that. Firstly, it’s the easiest time of day to line a subject up between you and the sun to get the high contrast needed. And secondly, the light is just so pretty! With so little detail of the subject on display, filling out the background with beautiful colour is a sure-fire way of making the image stand out.
But it’s not impossible to shoot silhouettes during the day. The rules still apply: all you need is that bright background and dark subject I keep going on about. Keep an eye out for animals hiding in the shade of a tree or bush – which they often are during hot, sunny weather – and you might be lucky enough to find a silhouette shot.
Here’s another image of that kingfisher from earlier, but what I didn’t mention before was that this was taken in the middle of the day. it briefly perched here in the shade of thick tree, where the bright blue sky and dark shade gave me the contrast I needed:
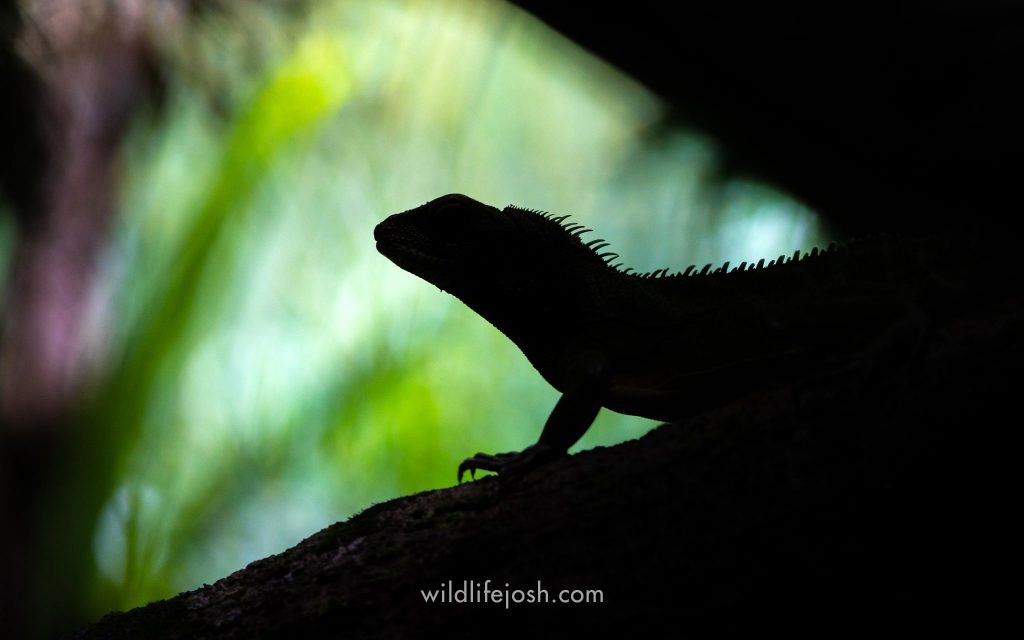
This next photo was taken in a Thai jungle the middle of the day. This Chinese Water Dragon was resting on a branch in the dark forest, but a river in the background let plenty of sunlight onto the vegetation behind. What did that lead to? Yep, contrast.
Wrapping Up
So there you have it! That’s the basics on how to shoot silhouette images. It’s not a skill that you can use every time you go out, but if the conditions are perfect then hopefully you’re now ready to capture some great images.
To recap, the main things to remember are:
- Background brighter than subject. Move yourself so the sun is behind the animal.
- Expose for the background. Spot metering or exposure compensation are easiest.
- Watch out for the animal’s pose and aim for clean outlines.
If you get a great silhouette shot then I want to see it! Make sure you tag me on Instagram @wildlifejosh
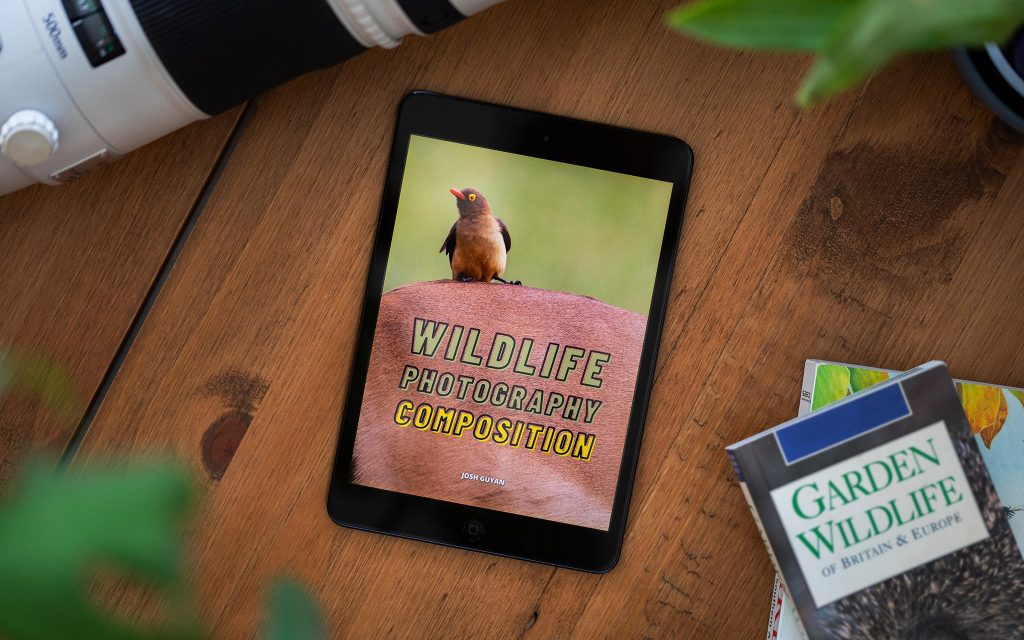
Want to take your wildlife photography to the next level?
My new Wildlife Photography Composition ebook is officially launching later this month, but for the next few weeks I’m making it available to my lovely email club members at a special pre-launch price. No waiting, you can download it and get cracking today!
My goal in this book is to share my approach to composition and get you thinking about how you can apply these ideas to your own photos. Whether you’re just starting out or you’ve been photographing wildlife for a while, there’s something in here for everyone.