If you’re just starting out with wildlife photography you may have heard the term back button focus. If you hadn’t, well, you have now. It’s a great way to take control of your camera’s autofocus and increase your chances of capturing great wildlife shots – so read on!
What is it?
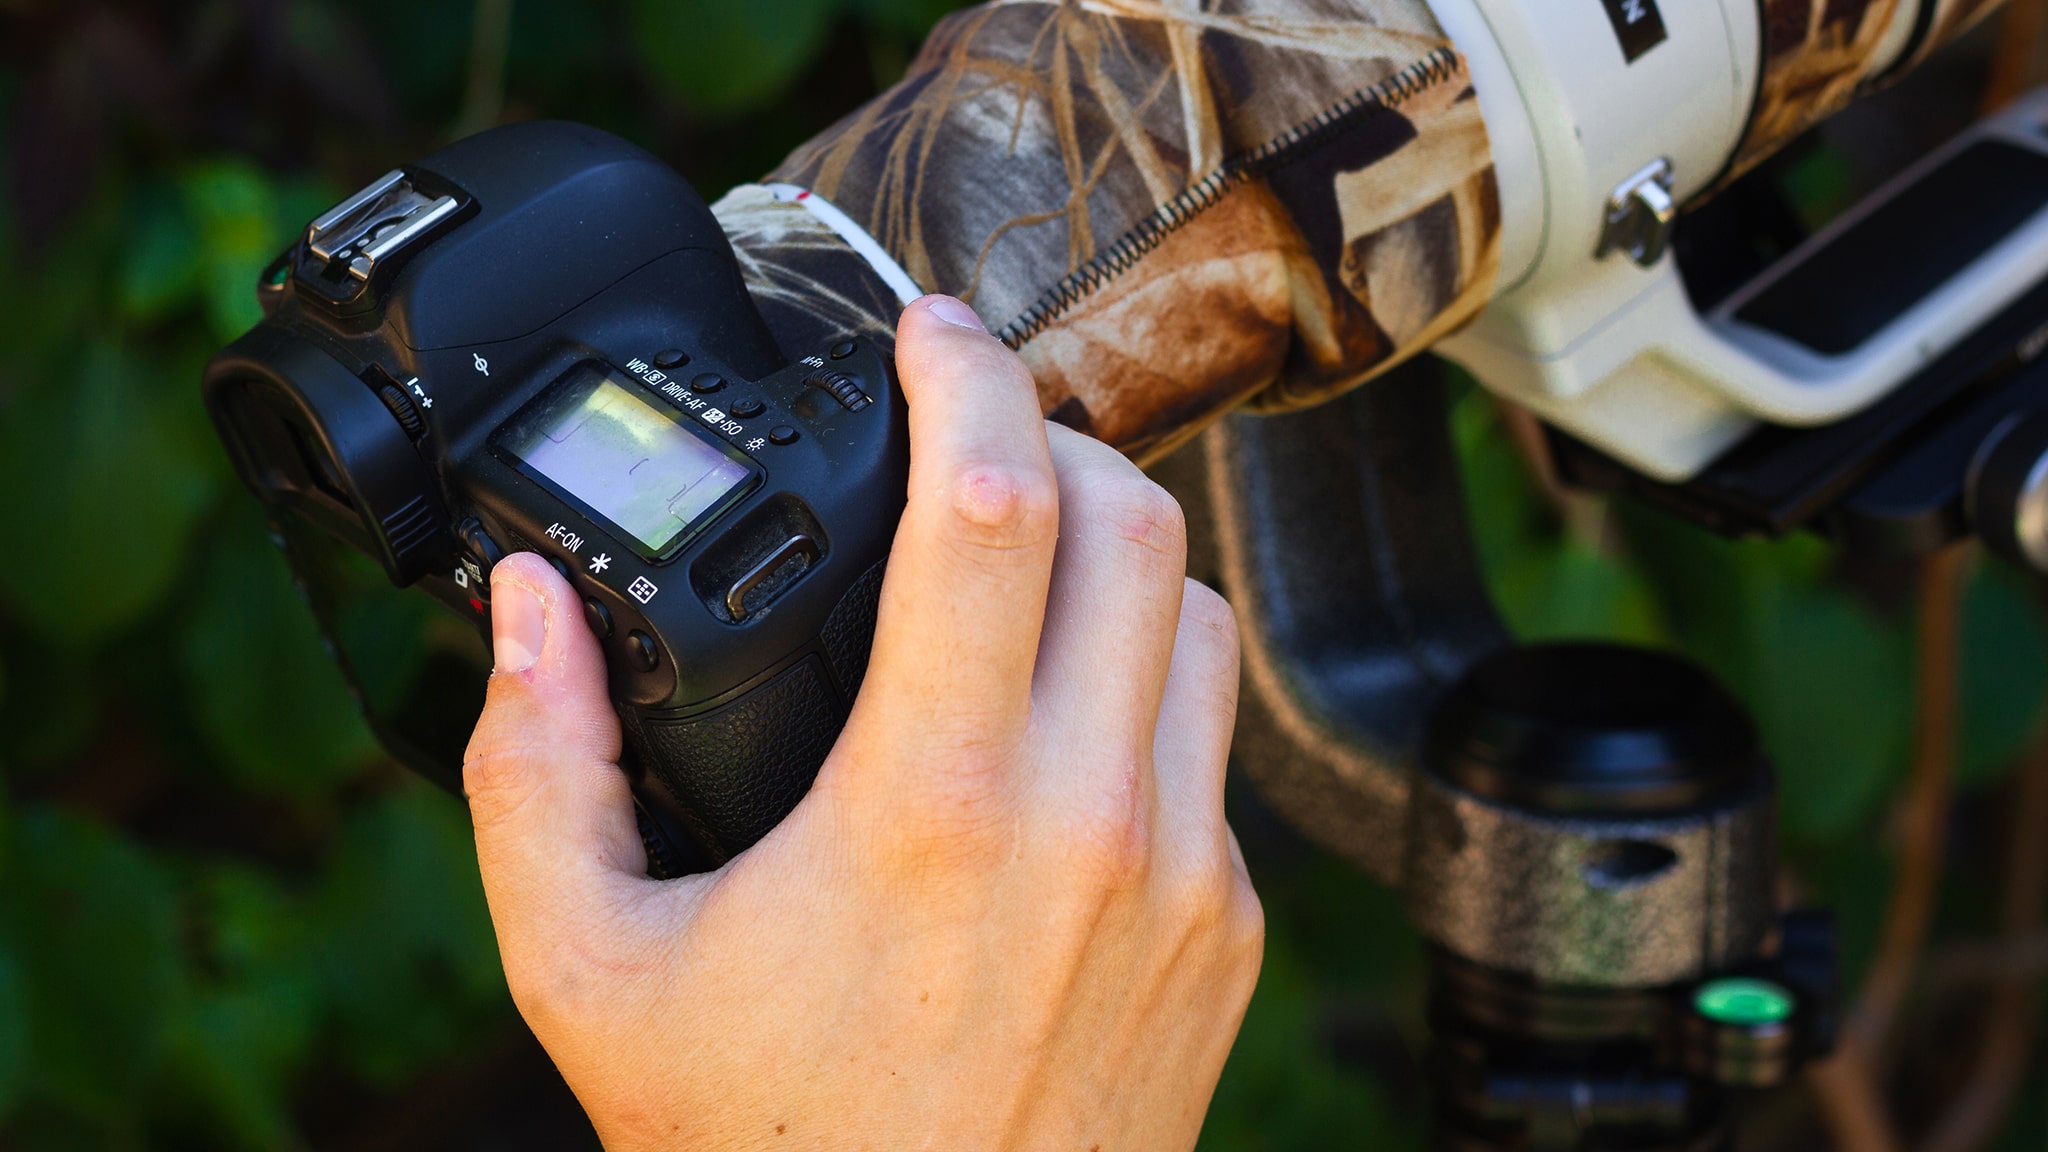
Fresh out of the box, most cameras work in the same way by default: you hold down the shutter button, the camera autofocuses, then it takes a picture. Whilst that may be fine for taking a picture of the family at your aunt’s birthday lunch, it can be problematic when photographing wildlife. We don’t always want the camera to re-focus before every picture, as this take longer and we risk the camera missing focus entirely.
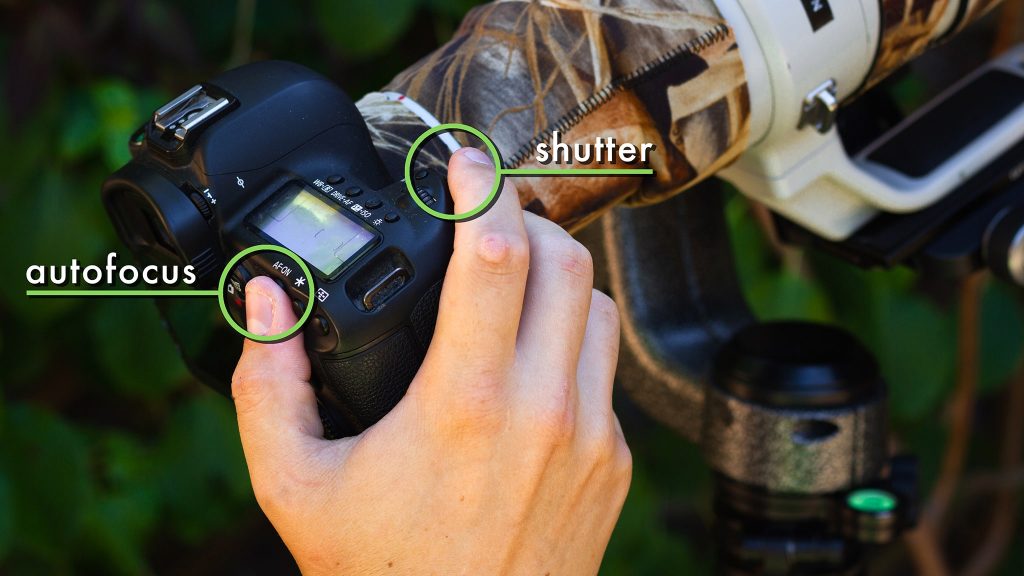
The idea of back button focus takes these two actions – the camera autofocusing and the camera taking a photo – and separates them onto two different buttons. You can then control the autofocus with one button (typically on the back of the camera, hence the name) and press the shutter button to take the picture. By decoupling these two actions you have more control over exactly when you want the camera to autofocus and, more importantly, when you don’t.
Why is it important for wildlife photography?
The beauty of this method is its flexibility, as it gives you more control over exactly when the camera tries to autofocus and what it’s trying to autofocus on. When photographing wildlife our shooting conditions are often unpredictable and fast-changing, so anything that helps you keep up will make a huge difference. Here are four different scenarios where back button focus can save the day:
Focus once and don’t miss the action
Let’s say you’re watching a stationary animal, waiting for it to do something interesting or turn its head the right way. You can focus on it once using back button focus, wait a while, then fire away and capture the action without having to re-focus.
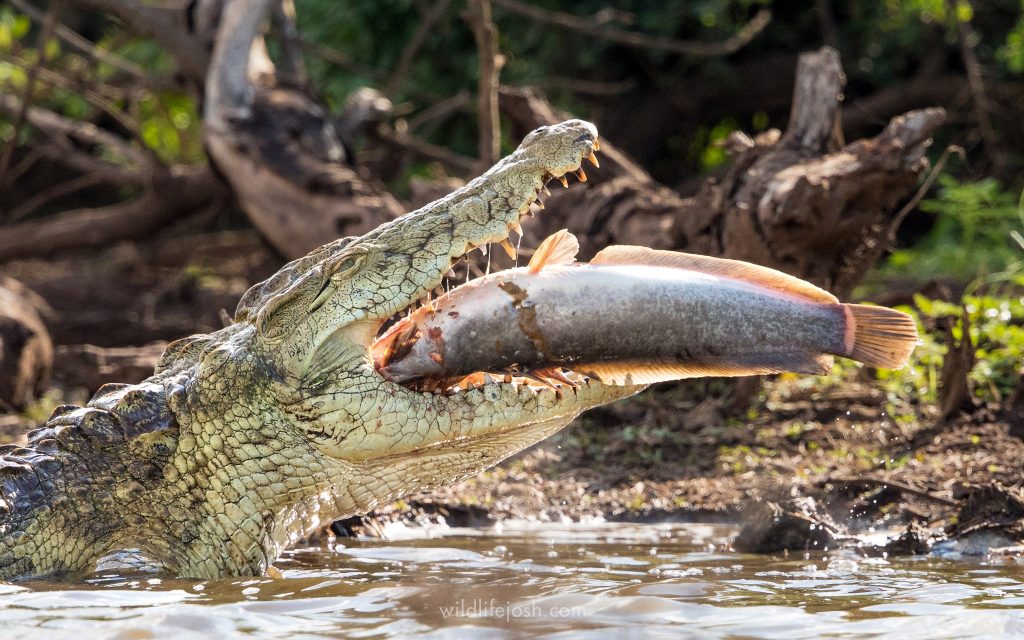
For the photo below I was able to start shooting the action as soon as this Nile Crocodile caught this catfish, without worrying about autofocus slowing me down. A second or two later the croc had disappeared into the lake again – blink and you miss it!
Predict and pre-focus
Now let’s say that you’ve spotted some repeat behaviour – a bird flying around and landing on the same branch over and over again, for example. You know that there’s a good chance it will land there again, so instead of following it around the sky with your lens and making yourself dizzy you can focus on the branch and wait. As soon as it lands you can take a picture without wasting any time.
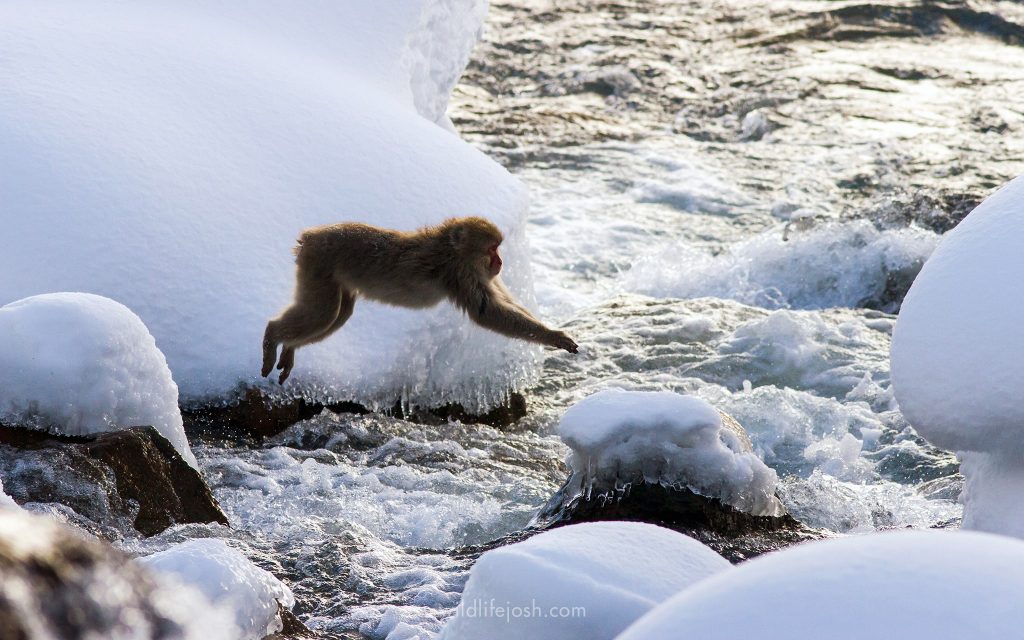
For the image below, I watched these Snow Monkeys crossing the river until I figured out where they were most likely to cross it. I pre-focused on the rocks and was able to catch them in the act.
Re-compose on the go
When composing an image, I try to capture the subject looking into the frame instead of out of it – in other words if the animal is on the left of the photo, I want it looking to the right. This helps to balance out the composition. Animals have a tendency to look the wrong way, though! By using back button focus you can focus on the subject once and then quickly recompose your image as it looks around. Note: this will only work if the distance between you and the animal doesn’t change.
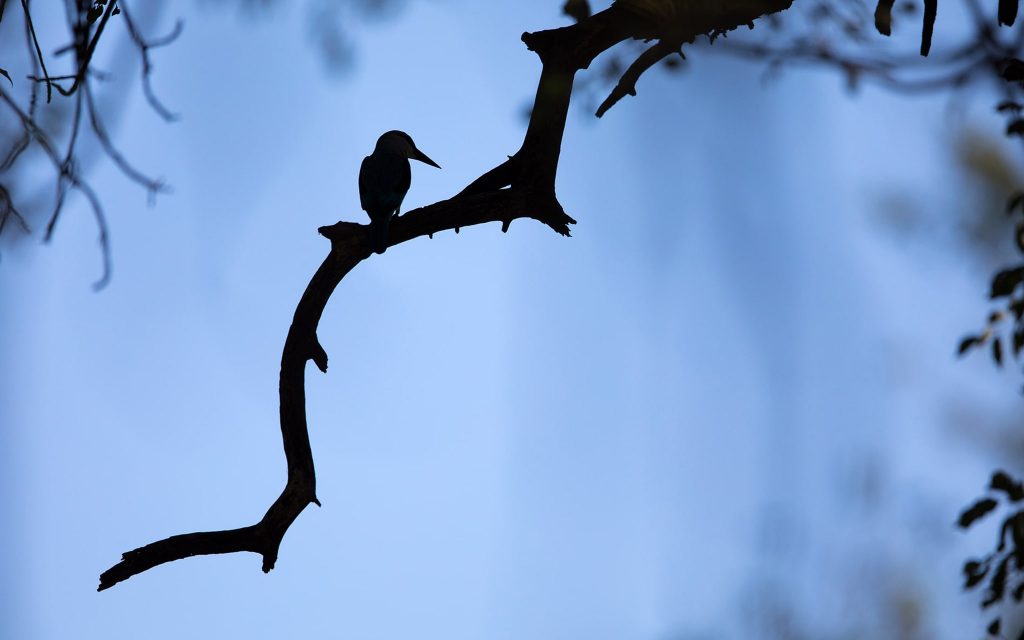
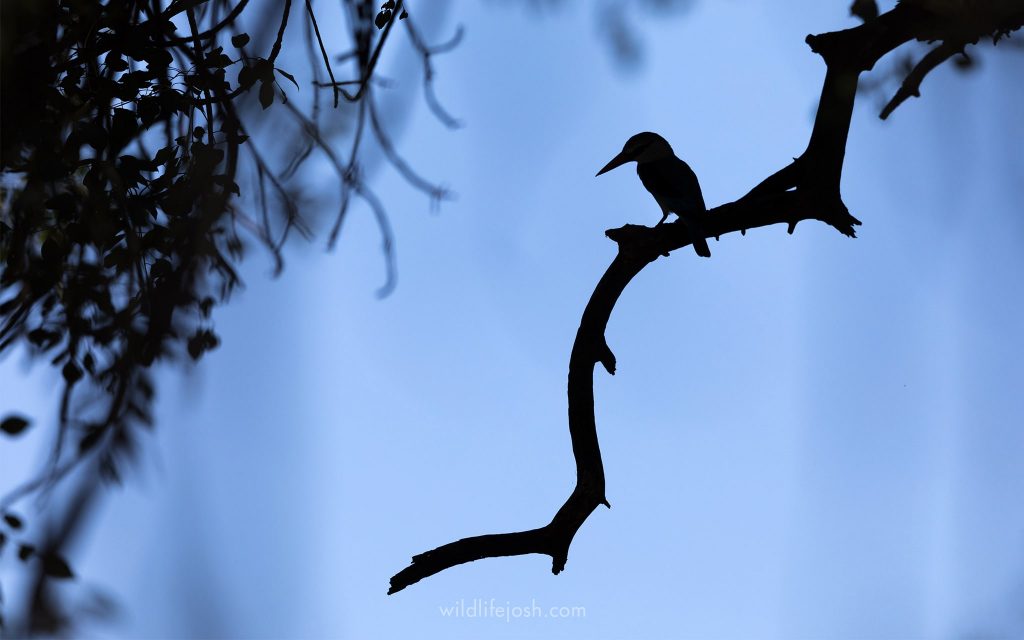
For the images below, I only focused once. I was then able to recompose my shot on the fly as this Woodland Kingfisher turned its head to keep it looking into the frame.
Manual focus control
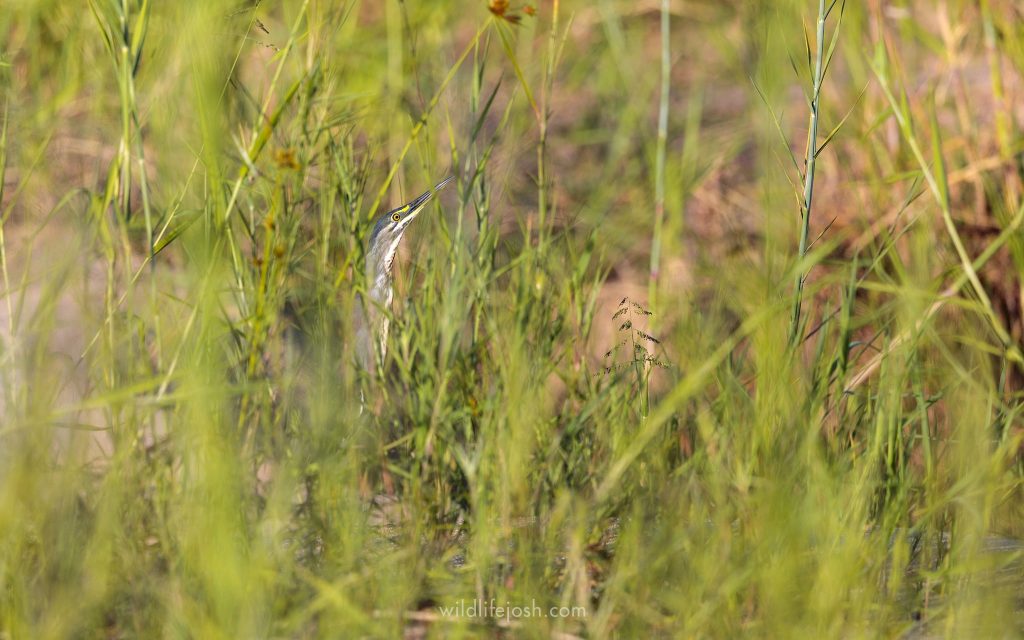
Even with the latest and fanciest cameras, there are some situations where the autofocus will struggle to lock onto the subject. This is especially true when you’re trying to take a photo of an animal in dense foliage, where the camera is more likely to lock onto leaves and branches instead. With back button focus you don’t need to waste time switching over to manual focus mode to overcome this – simply don’t press the autofocus button and take control of your focus manually.
For the image below, my camera’s autofocus struggled to lock onto this Striated Heron as it popped its head up amongst the thick reeds. I was able to manually focus and capture this shot before it ducked back down again.
How to set it up on your camera
Setting up Back Button Focus is different on every brand of camera, and often different between different models of the same brand. This isn’t a comprehensive list, but here are the basic things to look out for on the more common camera brands:
- Find Custom Controls in the menu
- Set Shutter butt. half-press to something that isn’t Metering and AF start (I set mine to AE lock)
- Set AF-ON (or AE/AF Lock) button to Metering and AF start
- Set your focus mode to AF-C
- Find Custom Settings -> Controls in the menu
- Set AF-ON (or AE-L/AF-L) button to AF-ON
- Change AF-C Priority Selection to Release
- Go to Custom Settings -> Pre-AF and set it to Off
- Set Custom Settings -> AF w/shutter to Off
- Go to Custom Key Settings -> AEL Button and set it to AF On
- Set Custom Key Settings -> AF/MF Button to AF/MF Ctrl Toggle
If you really get stuck, you should be able to find a tutorial for your specific camera on YouTube, or send me a message on Instagram and I’ll help you out!
Conclusion
So there you have it – the magic of back button focusing! I can’t count how many times it’s saved me out in the field, and I’m sure a lot of my portfolio wouldn’t exist if it wasn’t for using the technique. Be warned that it can take a little while to get used to (especially if you’re already set in your ways) but stick with it for a while and I’m sure you’ll start to see the benefits very quickly.
I’d love to hear from you about how you get on, so shoot me a message on Instagram and tell me all about it (or just say hello). If you enjoyed this article, please consider subscribing to my email list for future tutorials, photo breakdowns and more. Thanks!
Want to take your wildlife photography to the next level?
My new Wildlife Photography Composition ebook is officially launching later this month, but for the next few weeks I’m making it available to my lovely email club members at a special pre-launch price. No waiting, you can download it and get cracking today!
My goal in this book is to share my approach to composition and get you thinking about how you can apply these ideas to your own photos. Whether you’re just starting out or you’ve been photographing wildlife for a while, there’s something in here for everyone.